How to Replace the Ink Absorber in Your Canon Printer

If you own a Canon printer, you may encounter an issue where the printer notifies you that the ink absorber is full or needs to be replaced. The ink absorber collects excess ink during the printing process, but over time, it can become saturated, leading to printer errors. In this guide, we’ll walk you through the steps to replace the ink absorber in your Canon printer and get it running smoothly again.
What is an Ink Absorber?
The ink absorber is a crucial component of your Canon printer, designed to collect any excess ink that is not absorbed by the paper during printing. This includes ink waste from cleaning cycles and print head maintenance. As your printer continues to operate, the ink absorber can become full, triggering an error or message indicating that it needs to be replaced.
Why Replace the Ink Absorber?
Replacing the ink absorber is essential for maintaining print quality and preventing printer malfunctions. If the ink absorber is left too long without replacement, ink waste can overflow, damaging the internal components of the printer. To ensure your printer continues to perform at its best, it’s important to replace the ink absorber when necessary.
Step-by-Step Guide to Replacing the Ink Absorber in Your Canon Printer
Step 1: Turn Off the Printer
Start by turning off your Canon printer and unplugging it from the power source. This will ensure your safety while working on the printer’s internal components.
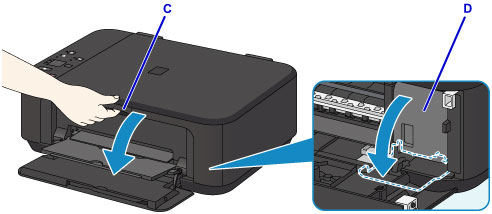
Step 2: Open the Printer Cover
Lift or open the printer’s top cover to access the internal parts. The ink absorber is typically located near the print head assembly or around the area where the ink cartridges are housed.
Step 3: Remove the Ink Cartridges
Carefully remove the ink cartridges from the printer. Place them in a safe, clean spot to avoid any ink spillage.
Step 4: Locate the Ink Absorber
The ink absorber pad is typically located near the bottom of the printer. It may be a small rectangular pad or sponge, depending on your model. You may need to remove any other parts or covers to fully access the absorber.
Also read : Canon Printer Error Code 6A00
Step 5: Remove the Ink Absorber
Once located, carefully remove the full ink absorber. Be cautious, as the absorber may be saturated with ink, so it’s a good idea to wear gloves or use a cloth to handle it.
Step 6: Clean the Area (Optional)
Before inserting the new ink absorber, take a moment to clean the area around it. Wipe any excess ink from the tray or internal components using a soft cloth to avoid ink stains and ensure a smooth installation.
Step 7: Insert the New Ink Absorber
Place the new ink absorber pad into the same position as the old one. Make sure it is properly aligned and securely placed to avoid future issues.
Step 8: Reassemble the Printer
Reinstall the ink cartridges back into the printer, close the printer cover, and plug the printer back into the power source. Ensure everything is securely in place.
Also read : Canon Printer Error 5200
Step 9: Reset the Ink Absorber Counter
In most Canon printers, simply replacing the ink absorber may not automatically reset the ink absorber counter. To do so, you’ll need to follow a specific reset process for your printer model. This typically involves pressing a combination of buttons to enter the maintenance or service mode. Refer to your printer’s manual or user guide for exact instructions on how to reset the counter.
Step 10: Test the Printer
Turn the printer on and perform a test print to ensure it is working properly. The printer should no longer show an error related to the ink absorber, and printing should be smooth without any issues.
Tips for Maintaining Your Ink Absorber
- Regular Printer Maintenance: Clean the print heads and run diagnostic tools periodically to avoid unnecessary ink wastage and prolong the life of your ink absorber.
- Monitor Ink Levels: Keep track of your ink levels and printer performance. If your printer is constantly showing ink absorber issues, it could be a sign that your printer is overusing ink or needs a deeper clean.
- Replace Absorber on Time: Don’t wait for the ink absorber to be completely full. Replace it as soon as you notice any error messages or if your print quality starts to decline.
Conclusion
Replacing the ink absorber in your Canon printer is an essential maintenance task that ensures continued performance and prevents unnecessary wear and tear. By following the steps outlined in this guide, you can replace the ink absorber yourself, saving time and money on professional repairs. Remember to monitor your printer’s performance regularly and replace the absorber when needed to keep your printer running smoothly.


